How to Start a Sashiko Project
Share
What to expect in this article:
- What tools you need
- How to prepare the project
- What stitch to use and how to do it
- Why it's essential for mental health
Before I start a Sashiko project, I have the following ready to go:
- Sashiko thread
- Sashiko needles
- Sashiko pattern printed onto fabric with water-soluble markings
Why am I mentioning Sashiko Japan products only? First, Sashiko threads are wound together. They're not straight threads placed together like DMC floss. The DMC floss has six strains that can be easily pulled apart, which is the opposite of Sashiko thread.
I strongly recommend the Olympus Sashiko thread because it's a heavy cotton thread, designed for Sashiko purpose, and I've been delighted with the result. Sashiko requires your time and effort, and I want you to have an excellent effect.
Second, the Sashiko needle has a large eye to fit the thread through, and it's super sharp and long enough to collect thread for the running stitch.
And you'll also want to have handy:
* Super Snips scissors
* Perhaps a needle threader
To date, the only patterns I've used are the Sashiko projects that are printed onto the fabric. I have yet to go rogue and create a design. If you don't want to use a pattern and stitch onto the fabric, then the only thing you need to keep in mind is that your stitch length and between the stitches should be the size of a grain of rice.
Now that you have what you need ready to start, it's time to prepare your Sashiko thread.
Assuming you've taken my suggestion with purchasing Olympus Sashiko thread. The Olympus thread is joined together in a circle.
The easiest way to avoid entangled thread is slowly taking the thread out of the plastic package, take off the paper, and then open the thread into the shape it wants to be, which is a circle.
Then look for the tiny piece of thread that is tied together around the large thread-ring and cut it next to the knotted piece. It doesn't matter which side of the knot you cut it on; you choose the left-side or the right-side.
The process takes only a moment, so I introduce this method in my workshops.
The cut thread is then to a length of about also has still a ga length, so I then leave the cut about 30"-36" inches off for my stitching. I use the same guideline as I do with DMC floss which holds the end of the thread close to my heart with my left hand and then pull the thread out with my right-hand and then pinches the result with my right hand and that's approximately 36" or so inches to use each time I go to start stitching.
After your thread has been cut, thread your needle, and then get your fabric pattern ready to begin stitching.
If you're having trouble threading your needle, use a needle threader.
You don't need a hoop.
It might surprise you not to need a hoop, but it's true.
Place the fabric project into your hands and look to a place where you would like to start. I would suggest beginning in the corner. Sometimes I'll to scrunch the fabric to get to the line of stitching I want to start on.
No knots.
When you're starting a project, you don't add a knot like you would with embroidery.
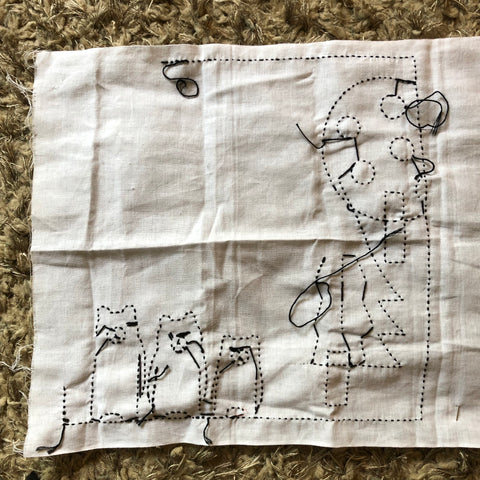
This is the backside of the Bears and Trees Sashiko project.
When first starting your project, you'll begin your running stitch three or four-stitching from where you would like to start stitching. If you're starting a new project, then I would look to the corner of the project but stick my needle either up or down four-stitch lengths because once you've gone forward four-stitches, you'll then turn around and go back over the stitches. You'll have buried your stitch and reinforced it by going back over it. Then keep going in the desired direction after you've back-stitched. You will do this every time you need to start and stop. On the underside of the project, it will leave a little tail.
Your stitch length should be the size of a grain of rice.
See images below for visual help. 
Not done yet, but progress has been made! This pattern is Bears and Trees, Click HERE to see what it will turn into when done.
Before starting a project, I scan with my eyes where my stitchings will go first and in what direction. I want to avoid starting and stopping stitching. My goal is to stitch until the thread runs extremely low.
The benefits of sewing for mental health is undeniable.
While you're working on a project, you're learning new skills. You're always improving. You're developing effective problem-solving strategies, not to mention, you have an opportunity to come up with amazing creativity.
Plus, sewing gives you all sorts of reasons to feel proud of yourself and like yourself better.
If you are struggling with an unbalanced lifestyle or you are suffering from a lack of drive or depression then, sewing might be a beneficial coping strategy for you because it's the overall feeling of accomplishment, self-confidence, and the joy of being in-the-moment.
Meeting with people or new people is important to keep a healthy balance in your life and joining a sewing community is a smart way to connect with other like-minded people. Our facebook page and Quilting your Legacy facebook pages has awesome people online you could talk with if you don't feel like going out or come into shop to talk sewing!
When talking to like-minded people it can be very motivating and fulfilling.
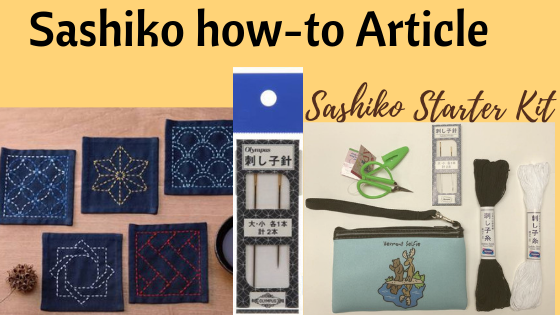
Lastly, when first starting, I highly recommend out Sashiko kit because it not only includes everything below, but it also fits a project in it neatly folded.
- Sashiko needles
- Super Snips scissors
- Sashiko thread in black and white
- Vermont zipper bag ready to hold everything peacefully and ready to take with you on the go
In my VT zipper bag, I have the items above, and my Sashiko bear's in the forest theme project neatly folded. It contains everything I need to work on my project anywhere.
You're officially all set to start stitching! Email or call with questions at the shop, Norton House Quilting.
One of the VERY BEST PARTS about Sashiko is that you can take it (almost) everywhere!

Even at the pool when the sun is getting ready to set and you're (begging) your kids to get out of the pool to get ready for bed, haha! The photo was taken on 6/20/19 by Emily.

Our cat Lou thinking I need his help, haha!
Thank you for reading this! Call or email with questions or book a one-on-one power hour to master the Sashiko skill. Call the shop to book your session with Emily.
Happy stitching!
-Emily (owner) from Norton House Quilting


33 comments
BWHQLnwl
qmuIQxyk
IPagAWxXzB
WZNiSUmEHBG
reORWYlLiIkJ